There are quite a few collectibles to find in the Intensive Care, Chapter 2 of the Dead Space Remake. These include audio, video, and text logs, as well as 5 upgrade Nodes. You’ll also gain access to the Kinesis Module and a new weapon, the Pulse Rifle. The latter two are unmissable. More importantly, perhaps, are the two weapon schematics and weapon upgrade that can be found.
You’ll also automatically pick up the following logs throughout Chapter 2, all of which are unmissable:
- Video Log: Destroy the Barricade
- Audio Log: Found Hydrazine Tank
- Audio Log: Shook the Whole Ship
- Audio Log: Almost Got Me
- Audio Log: Found a Shock Pad
- Audio Log: Find the Captain’s Rig
- Audio Log: Transmitting Codes
- Video Log: Go to Engineering
As with our Chapter 1: New Arrivals collectibles guide, this article does not cover the Marker Fragments found in the game’s New Game Plus mode. Everything you find here counts toward various trophies and achievements throughout the game, so be sure to follow along if you’re trophy or achievement hunting, or just want to know more about the game’s lore.
All Collectibles in Dead Space Chapter 2: Intensive Care
Node 1
After picking up the Pulse Rifle in the Security Station, follow the objective through the door leading to the Imaging Diagnostics Wing. Go down the hall and into Imaging Diagnostics itself.
Use Kinesis to move the exam table in your way, and enter a room with a circuit breaker on the far wall. Go through the door to the left. You’ll enter a room with a bench and the Node box on the far wall in front of you.
Audio Log (Patient Harris)
 Screenshot by GameSkinny
Exit the room and put the nearby battery into the circuit breaker. Flip the left-most switch, then go back to the beginning of the Imaging area. Go through the door marked Consultation Room. The log is on the desk with the anatomy model and microscope in front of you.
Text Log (Calculated Risks)
 Screenshot by GameSkinny
Go back to the circuit breaker, use the right lever, and take the lift up. Follow the path across by using Kinesis to move the platform, then go right into the hall. Go through the door labeled Observation Room, and pick the log up off the exam table to the right.
Pulse Rounds Schematics
 Screenshot by GameSkinny
After finding the Hydrazine, you’ll go back through the Zero-G area, then outside, then down an elevator shaft inside. Go through the door at the bottom of the elevator shaft (after Hammond comes across the comms for the Almost Got me log), and pick the schematics off the workbench on the left.
Audio Log (Nicole’s Log)
 Screenshot by GameSkinny
Follow the critical path back to Security, then to the Main Lab in Medical. During the quarantine section, defeat the Necromorphs, take the lift down in the back of the area, then defeat more Necromorphs.
Once the quarantine is lifted, go through the door labeled Dr. N. Brennan – SMO near the lift. Grab the audio log off of the desk inside. This will also start the Scientific Methods side mission.
Text Log (Anonymized Transcript)
![]() Screenshot by GameSkinny
Screenshot by GameSkinny
Pick this up off the bookcase in Dr. Brennan’s office.
Text Log (Marker Discovery)
 Screenshot by GameSkinny
Exit Dr. Brennan’s Office, and go across the area diagonally right to the office for Dr. T. Kyne – CSO. Look on the table inside, just to the left, when you enter. Interact with the monitor on the desk to play a video log for more background.
Audio Log (They Defy Death Itself)
 Screenshot by GameSkinny
Leave Kyne’s office, and turn left. Follow the path around to the left, through a locker room and into a restroom. The audio log collectible is on the floor in front of a toilet.
Stasis Pack Schematic
 Screenshot by GameSkinny
Follow the objective marker back toward the lift and into the Main Lab Changing Room. Pick the schematic up off the bench inside to the right.
Text Log (Vital Personnel)
 Screenshot by GameSkinny
Continue along to the Biological Prosthetics Center. Inside, grab the text log on the research desk in the far, back-right corner of the room, to the right of the lift.
Node 2
 Screenshot by GameSkinny
Take the lift up in the same room, then through the door through the Sanitary Showers to the Limb Stimulation Therapy room. The Node box is in the back right corner. This is where you pick up the Shock Pad.
Plasma Cutter Upgrade
 Screenshot by GameSkinny
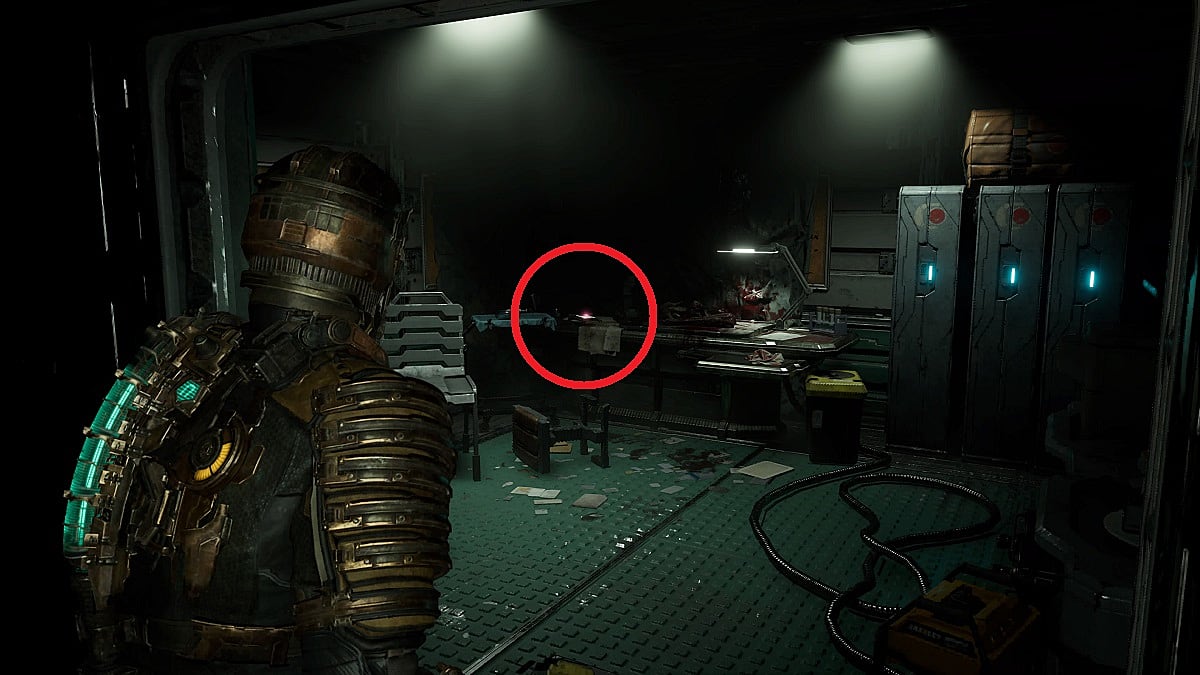
Place and detonate the Hydrazine bomb, then enter the Ishimura Clinic. Turn left when you enter to find the weapon upgrade on a bench against a wall with It’s Time scrawled on it in white paint. There is a Node box nearby, but you need Level 1 clearance to open it.
Text Log (Patient Observations)
 Screenshot by GameSkinny
Enter the Emergency Room, and go straight across to the far wall, past the monitor and keyboard with yellow/orange light, and toward the locked security door. Get this collectible from the examination table to your left after passing the yellow/orange monitor and keyboard.
Audio Log (Nicole’s Study)
 Screenshot by GameSkinny
This is part of a side mission that requires you interact with Nicole’s hologram in the Emergency Room. From the last collectible, go toward the circuit breaker, then look left to see the hologram. Watch it, then interact with the circuit breaker, activating the left lever to divert power left, lifting a shield and revealing a hidden door. Use Kinesis to open it, then pick the log up off of the table inside.
Audio Log (Rats in the Walls)
 Screenshot by GameSkinny
Remove the battery at the circuit breaker, and use it to power the door leading to the Emergency Hallway A. Follow it to the Intensive Care door, and interact with the panel to the right of the door with the message icon to get this collectible.
Audio Log (Colony’s Problems) + Node 3
 Screenshot by GameSkinny
Turn right from the last log, and follow the hallway to the end. The audio log is on the ground just to the right of the Oxygen dispenser, and the Node box is on the wall to the right of the log.
Text Log (Autopsy Report)
 Screenshot by GameSkinny
Take the elevator down to the morgue, and enter the morgue at the bottom. You’ll see examination tables with various bodies and body parts blocking the way in front of you. Head toward the Autopsy Room door ahead of you, but take the first right to go behind the bodies previously blocking your way. You’ll find the text log along the wall, by a fire extinguisher between two bloody steel sinks.
Node 4
 Screenshot by GameSkinny
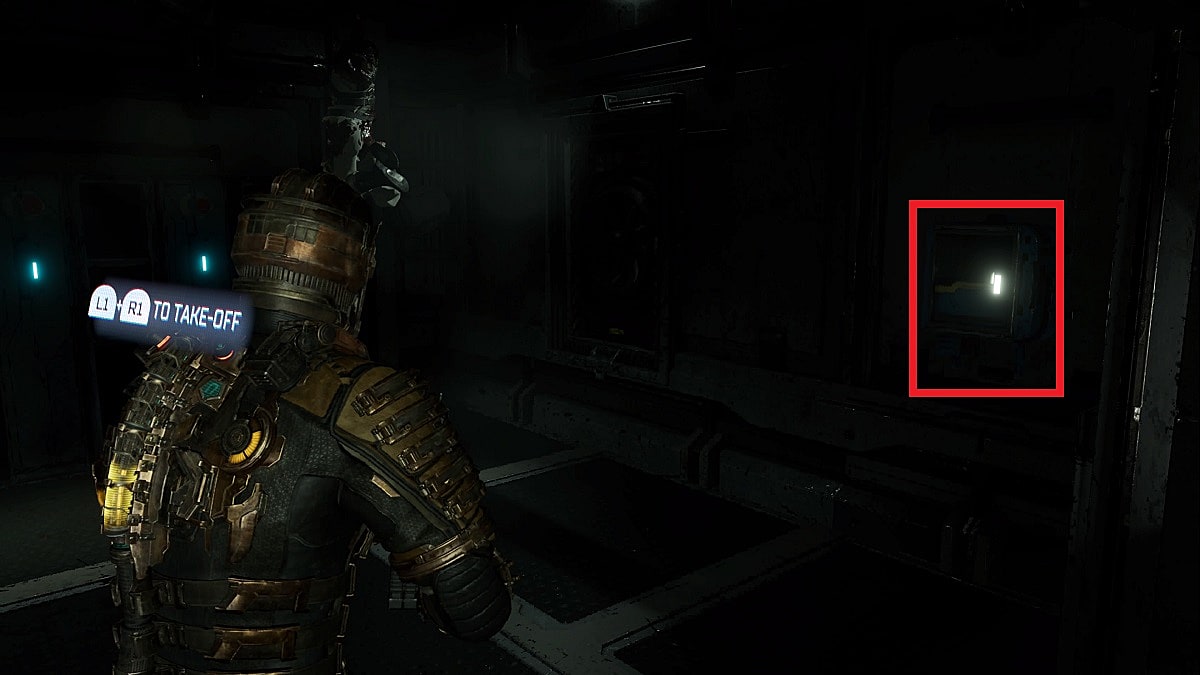
When you get the Captain’s Rig, you’ll upgrade your security clearance to Level 1, allowing you to get the Node in the Ishimura Clinic from earlier.
Node 5
 Screenshot by GameSkinny
On your way to the primary objective after getting the Captain’s Rig, you’ll return to the area in which you used the bomb to blow up the barricade. Go through the Imaging Diagnostics Wing Door, then through the Coolant Pipeline door in the hallway. Follow the path to re-enter the Zero-G area, then go up the elevator and through the opening. You’ll see a door on the left labeled Patient Locker Room in the next hallway. Go inside, and turn right to see the Node box.
Those are all of the logs, nodes, schematics, and weapon upgrades to be found in Chapter 2 of the Dead Space Remake, Intensive Care. Now it’s on to Chapter 3. For more, head over to our guides hub for EA’s survival horror remake.