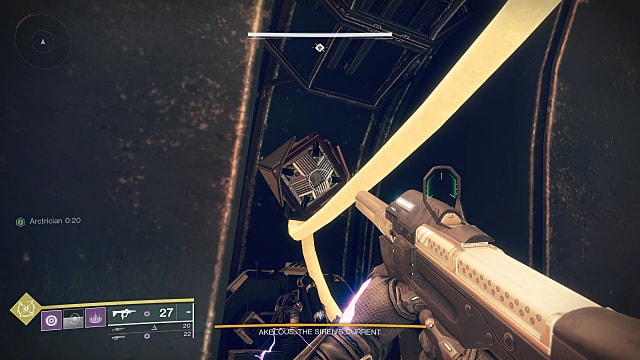
The first of two boss encounters in the Spire of the Watcher Dungeon, taking on Akelous, the Siren’s Current is a similar experience to Destiny 2’s Garden of Salvation first Raid boss. Dealing damage to this large Harpy is exactly the same, but getting to the damage phase is not. You’ll follow the same basic process from the previous two encounters to reach the DPS phase: running Arc energy through node conduits.
The damage phase officially begins once you’ve activated all four fuel rods by connecting all the Arc nodes. At that point, the boss will move to the last activated fuel rod, and damage starts.
You’ll have approximately 20 seconds to do as much damage to the boss as you can before it reactivates its shields and sends out a pulse of energy that knocks you back. Much like the Garden encounter, Akelous will be backing away from you the entire time, so your target will get smaller and smaller.
How to Beat Akelous, the Siren’s Current
You can start the encounter in two ways: destroying the Minotaur it’s munching on or walking close enough to the boss that it drops its meal and attacks you.
There are four main threats during this fight:
- Vex Goblins spawn on the main platform and the four “arms” extending from it.
- A frankly absurd number of Harpies will fill the air around the platform.
- Two Minotaurs that you need for the Arctrician buff.
- Akelous itself.
Once the fight starts, defeat either of the Minotaurs, grab the buff, and activate all four starting nodes on the central platform. Then activate four more nodes on each “arm” to power the fuel rod at the arms’ end.
Akelous will float over to the final rod you activate and spread its wings, revealing dozens of red eyes. Shoot all of these eyes until they break, and Akelous’s central eye will glow bright white and begin backing up. You’ll then do as much damage as possible until he goes immune again, and the process repeats.
The order you power the fuel rods doesn’t matter, but for our purposes, we’ll label them from 1-4 in clockwise order, with 1 being the fuel rod “arm” directly behind Akelous before the fight starts.
Fuel Rod 1 Arc Node Conduit Order
All four Arc nodes on the center platform are the first in the order, so we’re leaving them out of our order list. Once active, you can proceed to activate all of the nodes in sequence in any order. This is easiest as a fireteam: one person per arm, with whoever finishes first taking the fourth. Here’s the node order for fuel rod 1.
- The second node is beneath the platform to the left of the main “arm” walkway.
- The third node is directly beneath the walkway, nested in an alcove against the main platform.
- The fourth node is on the right side of the main walkway. You can see it from the third node’s location if you look along the side.
- The fifth node is on the left side of the main walkway, farther down than the fourth.
- The final node is next to the fuel rod at the end of and atop the walkway.
Fuel Rod 2 Arc Node Conduit Order
- The second node is beneath a platform to the left and behind the walkway, against the side of the center platform.
- The third node is on the side of the Spire beneath and to the left of the walkway and a bit of machinery.
- The fourth node is attached to some machinery midway down and to the right of the walkway. It faces the Spire.
- The fifth node is attached to similar machinery father down and to the left of the walkway.
- The final node is next to the fuel rod at the end of and atop the walkway.
Fuel Rod 3 Arc Node Conduit Order
- The second node is in an almost identical position to its counterpart on the “arm” 2: beneath a lower platform and to the left of the walkway.
- The third node is attached to the side of the Spire directly across from the second. Use the small bit of machinery at the corner as a marker.
- The fourth node is attached to the bottom of the arm holding the walkway up.
- The fifth node is attached to the right side of some machinery near the end of the walkway.
- The final node is next to the fuel rod at the end of and atop the walkway.
Fuel Rod 4 Arc Node Conduit Order
- The second node is on the underside of the arm’s main walkway.
- The third node is on top of the first set of machinery blocking the side paths.
- The fourth node is on the right side of the second set of machinery blocking the side paths.
- The fifth node is directly across from the fourth.
- The final node is next to the fuel rod at the end of and atop the walkway.
With all nodes active, you’ll have powered all the fuel rods, letting you deal damage. Use weapons like Linear Fusion Rifles and others that deal precision damage, plus weakening abilities like Void grenades, Hunter Tether super, and self-buffs like Radiant, Weapons of Light, and Well of Radiance. You’ll likely need at least two damage phases to take Akelous down the first few go-arounds and far more if you’re doing the Dungeon solo.
That’s about everything you need to know about completing the Akelous, the Siren’s Current boss fight in Destiny 2’s Spire of the Watcher Dungeon. Be prepared for another tanky boss to finish out the activity, but for now, enjoy your loot. For more on Destiny 2’s season of the Seraph and the game more generally, check out our guides hub.


