When you’re playing an MMO, sometimes, you just want to step in and be the powerful tank character, and the Heavy Guardian in Blue Protocol: Star Resonance suits that role no matter which of its two specializations you end up choosing when given the choice at level 20.
Meant for building and utilizing your impressive Rage, as well as for tanking as much damage as you can by upgrading your skills, the Heavy Guardian is a class in Blue Protocol: Star Resonance that comes with the lowest barrier to entry in terms of difficulty of the game’s other tank roles.
Class Overview
Are you a fan of playing the heavy tank characters in your favorite MMOs, stepping gallantly into the role of taking defense and controlling the situation in close-range combat? Are you looking to be just as offensive as you are defensive, with both AoE and single-target moves expanding throughout your skill tree? Then the Heavy Guardian in Blue Protocol: Star Resonance may be the class for you!
Relying on your brute Strength in all situations, you’ll find the two Specs vary a bit based on what kinds of damage you’re trying to prevent. If outright damage mitigation is your goal when playing a tank role, you’ll likely want to stick with the Earthfort spec. If you’d rather increase the challenge of using your character a bit to double down on how effective you are against physical damage in battle, consider the Block Spec instead.
Both Specs for the Heavy Guardian will be using the Sandshroud skill as one of their main skills, which covers your character in sand that then hurts the enemies nearby while offering you both Rage regeneration and Sand Crystal acumulation. You’d do well to keep Sandshroud active whenever you’re in combat.
Heavy Guardian Earthfort Spec
-
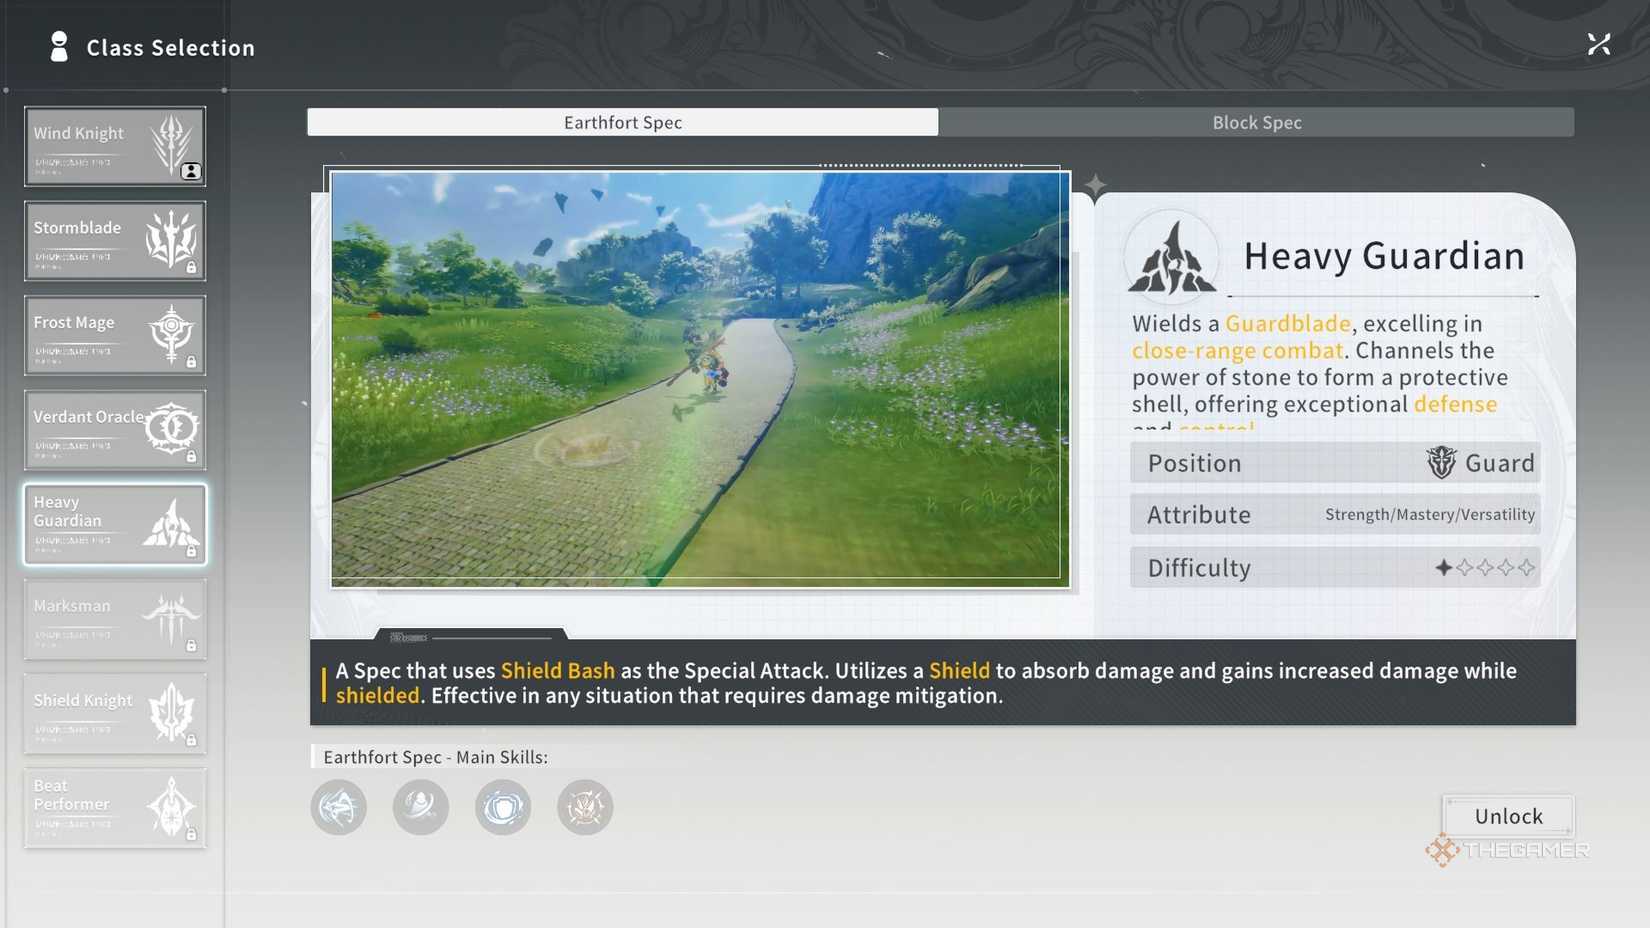
A Spec that uses Shield Bash as the Special Attack. Utilizes a Shield to absorb damage and gains increased damage while shielded. Effective in any situation that requires damage mitigation.
Position
Guard
Attribute
Strength/Mastery/Versatility
Difficulty
1 Star
Earthfort Spec Skills
-
Star Shatter: Charges ahead with immense force. Upon hit, gains 25 Rage and 1 Sand Crystal, deals Attack Damage, and stuns the enemy. Becomes unstoppable during the execution of the charge. This skill holds 2 charges.
- Best Use: When you need to build Rage quickly.
-
Sandshroud: Gather sand around yourself, dealing a burst of Attack Damage to surrounding enemies. The sand then solidifies, dealing Attack Damage to surrounding enemies for 6 seconds. Throughout this effect, you continually generate Rage and Sand Crystal, providing 33 Rage and 6 Sand Crystals.
- Best Use: Whenever you’re in battle, especially with multiple enemies around you.
-
Stoneform: Channels Earth Strength to taunt nearby enemies while automatically counterattacking Lethal Skills for 10 seconds. Also increases Armor and reduces damage taken by 20%.
- Best Use: When in heavy combat and your HP is low.
-
Rage Burst: Consumes 50 Rage and 5 Sand Crystals. Unleashes a mighty roar, dealing Attack Damage to nearby enemies, interrupting their actions, and granting an all-damage-absorbing shield (which may be stacked, with a maximum capacity equivalent to 100% of your maximum HP). Reduces Attack Damage taken from the target by 10% for 12 seconds.
- Best Use: When your HP is higher, or to produce good armor if you’re in a tough situation.
-
Star Shatter: Charges ahead with immense force. Upon hit, gains 25 Rage and 1 Sand Crystal, deals Attack Damage, and stuns the enemy. Becomes unstoppable during the execution of the charge. This skill holds 2 charges.
-

Heavy Guardian Block Spec
-
-
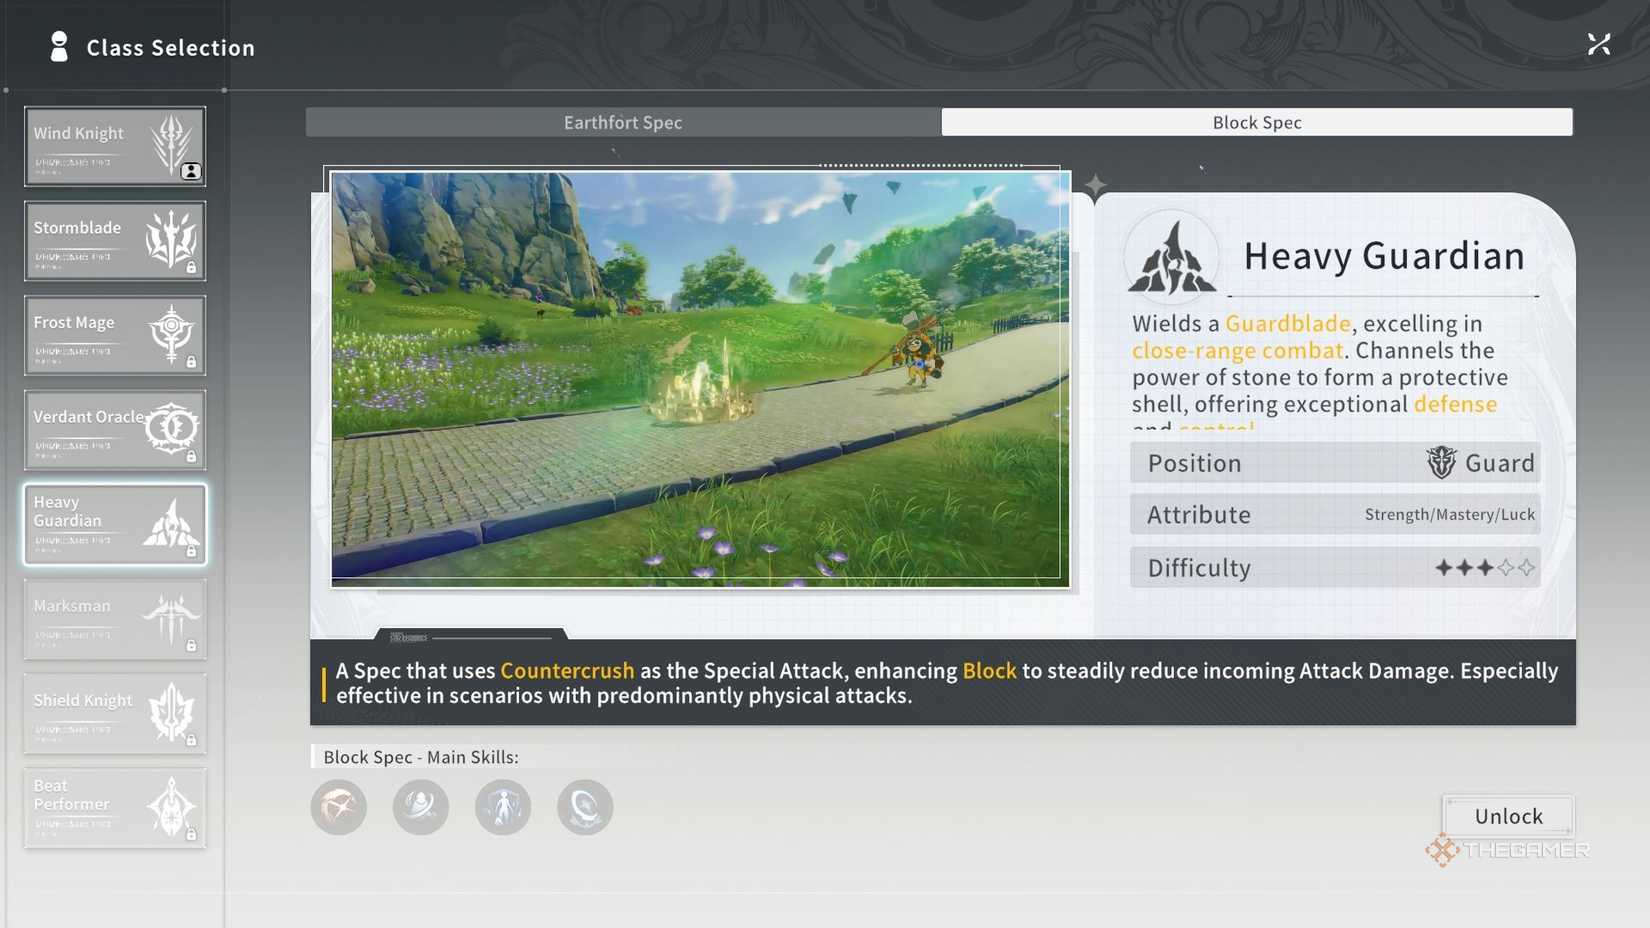
A Spec that uses Countercrush as the Special Attack, enhancing Block to steadily reduce incoming Attack Damage. Especially effective in scenarios with predominantly physical attacks.
Position
Guard
Attribute
Strength/Mastery/Luck
Difficulty
3 Star
Block Spec Skills
-
Granite Fury: Consumes 3 Sand Crystals, dealing Attack Damage to the target and reducing damage taken by 10% for the next 10 seconds. (Non-stackable)
- Best Use: When you have enough Sand Crystals and need to deal a lot of damage quickly.
-
Sandshroud: Gather sand around yourself, dealing a burst of Attack Damage to surrounding enemies. The sand then solidifies, dealing Attack Damage to surrounding enemies for 6 seconds. Throughout this effect, you continually generate Rage and Sand Crystal, providing 33 Rage and 6 Sand Crystals.
- Best Use: Whenever you’re in battle, especially with multiple enemies around you.
-
Brave Bastion: Forms a rock barrier around yourself that automatically counterattacks Lethal Skills for a set duration. Taunts nearby enemies and increases Block Damage Reduction. For each Sand Crystal consumed, the duration is extended by 1 second, up to a maximum extension of 5 seconds.
- Best Use: When you’re about to be hit with a heavy-damage attack.
-
Sandgrip: Consumes 30 Rage to swing your weapon and create a vacuum, pulling nearby enemies toward you. Deals Attack Damage, interrupts their actions, and reduces their Move Speed by 70% for 8 seconds.
- Best Use: When the monsters are too far away to hit.
-
Granite Fury: Consumes 3 Sand Crystals, dealing Attack Damage to the target and reducing damage taken by 10% for the next 10 seconds. (Non-stackable)

Best Talents
Like plenty of other remarkable tank roles in your other favorite MMO titles, the Heavy Guardian will be building and using Rage in combat to power up and deliver some hefty blows no matter which Spec you’ve chosen. Rage is especially helpful for Earthfort Spec Heavy Guardians, but Block Specs can find ample use for it in their kit as well.

|
Talent |
Description |
Notes |
|---|---|---|
|
Rage Awakening |
Consuming Rage has a chance to enter Enraged state for 5 seconds. The more Rage you consume, the higher the chance. Each Rage increases the chance by 1%. |
It’s iconic of tanks in the best MMOs to work based on Rage, so engage with this early to build your ability to amass Rage and duble down on your perks with it down the skill tree from here. |
|
Weak Point Strike |
When dealing Damage, Basic Attacks have a fixed 10% chance to trigger Weak Point Strike once. (Weak Point Strike: Deals Attack Damage equal to 50% Attack to an enemy and grants 1 Sand Crystal.) |
You’ll find plenty of uses for Sand Crystals in your skill tree, and you’re likely to use a litany of Basic Attacks in combat, so why not add a chance to deal some stellar additional damage? |
|
Power Conversion |
Armor +2,000, and 3 Strength provides 2 Armor. |
As a primarily Strength-based class, either Spec for the Heavy Guardian will benefit from building this one up early. |
|
Life Suppress |
You gain the Suppress Expertise effect. (Suppress: When taking damage and your HP percentage is higher than your attacker’s, this reduces the damage the attacker deals to you by 10%. When dealing damage and your HP percentage is higher than the target’s, it increases the damage you deal to them by 10%.) |
With an HP pool as big as yours is by default, you’ll almost always be in a position to benefit from Suppression. |
|
Stone Fragment Tide |
For 8 seconds after you cast Tectonic Ring, each Basic Attack pulls a target that’s between 8-20 meters away toward you. (The same target cannot be pulled again for 3 seconds.) |
This is good for yanking enemies out of crowds to pick them off one by one. |
|
Healing Sands |
Max HP +10%. |
This is helpful to compound with Suppression, raising your chances of your HP being higher. |
|
Enhanced Weak Point Strike |
Weak Point Strike’s fixed trigger chance gains 10%. |
Double down on your chance to deal that extra 50% damage to an enemy around the mid-game, when the foes begin getting tougher. |
|
Sandstone Revival |
For each Sand Crystal consumed, restore 1% of max HP. |
This is best if you’ve got a good way to build your stacks of Sand Crystals and need a little HP boost for the end of the skill tree. |
|
Enraged Suppress |
During the Enraged state, Suppress’ effect is increased by 50%. |
With so many ways to double down on Suppress, you’ll want all the ways you can to make sure it’s that much more potent. |
|
Fury Shelter |
While Enraged, your max HP is increased by 20%. |
As a tank character who scales with Rage in combat, it’s always helpful to gain some extra HP when possible as you round out your talent tree. |
|
Enrage Delay |
When Strength reaches 500, extends the duration of Enraged by 1 second. |
By the time you get this far down in the skill tree for a Heavy Guardian in Blue Protocol: Star Resonance, you’ll no doubt hit the mark for triggering that extension. |
|
Valiant Fury |
When Enraged, you gain 30% bonus Armor that decreases by 5% per second. |
This is a nice final skill to pick up that doubles down on your densive capabilities. |

Best Gear
With Strength at the core of the gameplay with the Heavy Guardian in Blue Protocol: Star Resonance, you’ll need to be sure you’re building this main stat as much as you can. Both the Earthfort and Block Specs will need to double down on their Mastery – we can’t assume those heavy hits they’re taking come easy! – but the Specs separate in their final substat.
Earthfort players will want to increase their Versatility with the gear they give their Heavy Guardian, since you’re responsible for dealing with damage of every type. Meanwhile, the Block Spec characters will find themselves relying more on their Luck to tank damage more effectively, so stack as much Luck in your gear as possible to ensure you’re bringing the best odds into battle with you.