
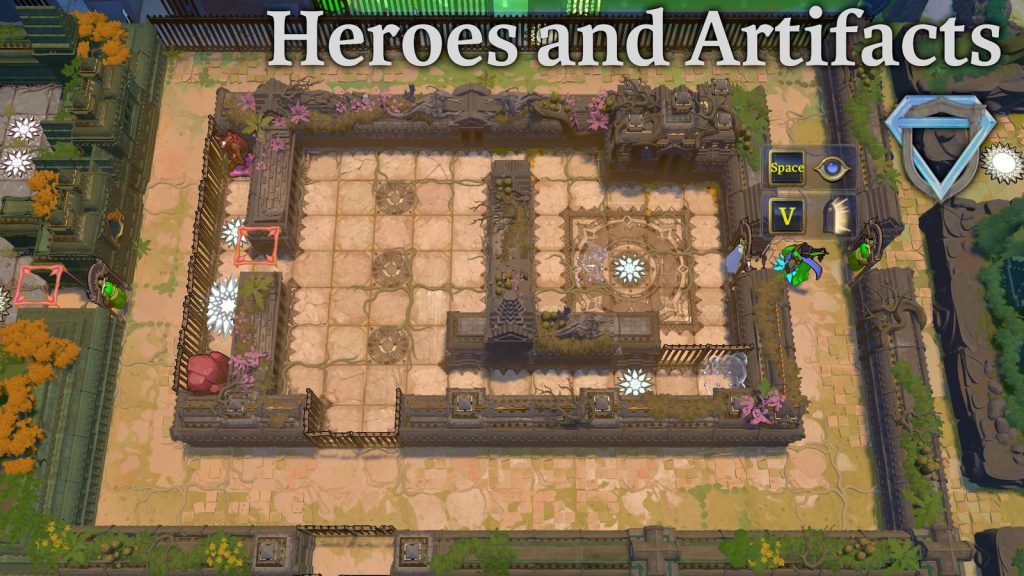
Heroes and Artifacts is a northwest area in Order of the Sinking Star. It, along with Heroes and Light, is accessed by opening the HxB gold room, which can be reached after making significant progress in Heroes of Hauling and Vault of the Beamcasters. This walkthrough will help you solve all the puzzles found in Order of the Sinking Star’s Heroes and Artifacts area.
Instructions that give an unmodified direction (e.g. “move left”) mean move one square in that direction. If the direction has a modifier (e.g. “x3”), move that many squares in the indicated direction. If the term “all the way” is used, travel in that direction until you run into a barrier or reach the end of a path.
HxB Gold Room

Puzzle Solution
- Use the miner to collect the power-up, and pick up the bottom gem. Put the gem in the holder.
- Use the miner’s ability to push the laser up. Put the cleric in the blue beam, and push the two right monsters up.
- Move the cleric to the left side of the left monster.
- Use the miner’s ability to push the remaining gem up x2. Then push it right to push the cleric and left monster right.
- Use the miner to push the laser up. Then use the cleric to push the left monster down.
- Use the miner to push the laser down x2. Use the cleric to push the monster right.
- Use the miner to push the laser down. Use the cleric to push the monster up. Keep moving the laser up and pushing the monster up until it is between the other monsters, deactivating the barrier. You will need to use the cleric to push the gem on her side up before you can perform the final monster push.
- Use the miner to push the laser into the row with the crystal. Use the cleric to push it left and access her teleporter.
- Use the miner to continue pushing the laser downward to clear the path to his teleporter.
Heroes and Artifacts Screen #1

Right Puzzle Solution
- Collect the power-up.
- Use the ability to push the rock up, right.
- Pull the rock all the way right. Push it right.
- Pull the rock all the way down. Push it down.
- Pull the rock left. Push it left x2.
- Pull the rock up, left, up into the row with the barrier. Push it all the way left.
- Pull the rock all the way down. Push it up onto the button.
Bottom Puzzle Solution
- Collect the power-up.
- Push the rock right. Use the ability.
- Push the rock down. Use the ability.
- Push the rock left. Use the ability.
- Push the rock up, right. Use the ability.
- Push the rock up, right. Use the ability.
- Push the rock up x2, down x4, up, right, up. Use the ability to push the rock right.
- Push the rock up x2, all the way down. Use the ability.
- Use the ability to push the rock back up.
- Push the rock right. Use the ability.
- Push the rock all the way up, right to block the monster.
- Move to the right of the monster behind the bars. Use the ability to push the monster row left.
- Use the ability to push a rock up past the bars. Push another rock to its right.
- Push the final rock into the fourth column to the right. It will block the monster when you push the row back to the right.
- Move to the left of the far left monster. Use the ability to push the monster row right. A rock is now blocking the far right monster, giving you access to the teleporter.
How to Reach the Middle Puzzle
- Pull the rock all the way left, all the way up. Use the ability to push it right x4, sending it through the wall.
- Pull the rock all the way right, all the way left. Use the ability to push it all the way down, moving the monster.
Middle Puzzle Solution
- Collect the power-up.
- Move all the way up, all the way right, down x2, left x2. You now have two crystals in the bottom row of your aura.
- Move left x5, all the way down. The crystals are now in your row.
- Move to the right of the top-left button so that your left crystal is just right of the button. Use your ability to push the left crystal onto the button.
- Grab another crystal to the left of the crystal you are currently holding. Use the strategy from Step 4 to put it on the bottom-left button.
- Repeat the process with the final crystal to put it on the bottom-right button.
- Move to the top-right button to deactivate the barrier.
- Move the miner below the crystal the bard has captured. Move the bard right, all the way down to get the crystal out of her row.
- Move the miner out of the way. Run the bard into the left wall to get the crystal above her. Then use the ability to push it up.
- Move the miner into the space between the bard and the crystal. Move the bard so that the crystal is below the top-right button. Use the ability to push the crystal up onto the button.
How to Reach the Left Puzzles
- Pull the rock up. Use the ability to push it right, down x2 to the right side of the monster.
- Use the ability to push the monster-rock row left x3.
- Pull the rock up x2, left. Use the ability to push it down x2, pushing the monster into the row with the long horizontal wall.
- Pull the rock up. Use the ability to push it right x2.
- Pull the rock right x3. Use the ability to push it down x2, left, pushing the monster left.
- Pull the rock up x2, all the way left. Use the ability to push it down x3, right, putting it under the monster.
- Use the ability to push the monster-rock column up x5.
- Use the ability to push the rock right, up, putting it to the right of the monster.
- Use the ability to push the rock-monster row left x3, putting the monster on the top button.
- Pull the rock all the way down. Use the ability to push it down, left onto the bottom button.
Left Puzzle #1 Solution
- Use the miner to collect the power-up.
- Move the miner all the way right, up, left. Move the wizard to the right of the miner and swap positions.
- Move the wizard to the bottom-right corner, and swap positions with the miner. Use the miner’s ability to push the rock left.
- Use the wizard to swap the rock into the top-left corner.
- Move the miner into the column to the right of the rock, facing left.
- Use the wizard to swap the miner up to the row with the rock. Then use the miner’s ability to push the rock left x2.
- Move the wizard to the top-right corner, left.
- Move the miner below the wizard, facing right. Use the wizard to swap positions.
- Move the wizard to the right of the miner. Use the miner’s ability to push the wizard right x2. Use the wizard to swap positions, giving the miner access to the right teleporter.
- Use the wizard to swap positions with the rock, giving him access to the left teleporter.
Left Puzzle #2 Solution
- Collect the power-up.
- Move left x3, all the way down. Swap with the monster.
- Move into the row with the rock, and into the column with the monster. Swap with the monster.
- Move to the left of the rock. Swap left with the monster. Swap right with the monster. Use the ability to push the rock right.
- Swap the monster until it is in the bottom-right corner.
- Move below the rock. Swap down with the monster. Swap up with the monster. Use the ability to push the rock up.
- Swap the rock until it is in the top-left corner.
- Swap with the monster until it is to the right of the rock. Swap left with the monster. Use the ability to push the rock left.
- Repeat the previous step until the rock is in the column to the left of the top monster. Then swap with the rock to access the teleporter.
Pass through the open barrier on the left to reach screen #2.
Heroes and Artifacts Screen #2

Top-Right Puzzle #1 Solution
- Use the wizard to swap the miner to the left platform.
- Use the miner to collect the gem. Then use the wizard to swap him back to the right platform. Place the gem on the right holder.
- Use the wizard to swap with the miner. Then swap the gem into the top row of the right platform.
- Use the wizard to swap with the miner again. Move the miner to a teleporter.
- Swap the wizard with the gem, and move him to a teleporter.
Top-Right Puzzle #2 Solution
- Use the wizard to swap the gem into the bottom-right corner. Then swap with the miner.
- Move the miner onto the square with the gem. Use the wizard to swap with them both simultaneously.
- Move the miner out of the square. Use the wizard to swap with the gem.
Bottom-Left Puzzle Solution
- Collect power-ups with both characters.
- Move the left character onto the square with the sun, facing down. Use the right character to push him left x2. Use the left character to push the stone down and go to the next platform.
- Move one character onto the square with the sun, facing down. Use the other character to push him up.
- Move the second character onto the sun square, facing right. Use the first character to push him down to the stone. Push the stone right and go to the next platform.
- After crossing the submerged stone, move one character all the way right, up. Use the other character to push him right.
- Move the second character above the first character, facing right. Use the first character to push him up.
- Move the first character to the right of the second character, facing up. Use the second character to push him right. Then push the stone up.
How to Reach the Top-Left Puzzle
- Push the rock up, right x3.
- Use the ability to push the stone up through the wall, completing the path to the platform with the puzzle.
Top-Left Puzzle Solution
- Collect the power-up.
- Push the rock right. Transform the plant to its left.
- Push the rock right x2, up. Transform the plant below it, the plant above it, and the plant above it and to the left.
- Push the rock up, left, down. Transform the plant in the rock’s row.
- Push the rock left x4, up, left. Transform the plant to the rock’s right.
- Push the rock left, down, left, up. Transform the plant below the rock.
- Push the rock up x2, left to access the teleporter.
How to Reach the Top-Middle Puzzle
- Push the rock on the top-left platform onto the submerged rock. Use the ability to push it down. Push it left.
- Move the other rock on the lower platform to the right of the rock you just pushed down. Use your ability to push it up onto the submerged rock.
- Push the remaining rock right. Use your ability to push it up through the wall.
- Push the rock on the submerged rock left into the water. Push the remaining rock into the top-right corner. Push it right into the water.
- Use the reset square on the top platform. Push the reset rock across the rock you just submerged to reach the puzzle.
Top-Middle Puzzle Solution
- Collect the power-up.
- Push the monster down x2, right x2. Cross the water gap above the monster to reach the next screen.
- Push the right monster right. Push the left monster right, up, right, up. Enter the water above the bottom monster, and move up, right to reach the next screen.
- Push the monster left, up. Cross through one of the water gaps on its sides to get above the monster. Push it down x2, right x2. Cross the water gap below the monster to reach the next screen.
- Push the bottom monster down into the water. Push the top monster up into the water. Push the remaining monster up x3, right. Enter the water down, right from the monster, and move up, right to the next screen.
- Push the left monster down, up x2. Push the right monster left x2. Move into the water square above the right monster. Push it down, right x3. Cross the water gap below the monster to reach the next screen.
- Push the bottom monster into the bottom-right corner. Push the top monster down x2, up, right, up x2, right. Cross the water gap below the monster to reach the next screen.
- Push the top monster left. Cross to the bottom platform. Push the bottom monster right x2. Cross to the top platform. Push the top monster right x2. Cross to the next screen.
- Push the top monster left, down, left, down x2. Push the right monster right x2, up. Push the left monster up x2, right, up, right x2. Cross to the platform with the teleporter. Push the monster blocking it right x2.
Heroes and Artifacts Screen #3

How to Reach the Bottom Puzzle
- Start on screen #2. Reset the rocks on both platforms.
- Submerge one of the bottom rocks so you can move freely between the two platforms.
- Push the rock on the top platform onto the submerged rock and down through the wall. Push it all the way left and use your ability to push it through the wall. It will submerge on screen #3.
- Push the remaining rock up, all the way left. Use your ability to push it through the wall onto the submerged rock.
- Go to screen #3 and push the rock up to gain access to the top of the path.
- Push the rock on the path down to access the puzzle.
Bottom Puzzle Solution
- Push blocks up the left column in this order: rock x2, crystal, rock x2, crystal, rock x2.
- Use the green beams, which are passing through crystals, to reach the teleporter.
How to Reach the Top Puzzle
- Return to screen #2. Reset the rocks on the bottom platform.
- Push one rock up, all the way left. Use the ability to push it left onto the submerged rock on screen #3. Push it up into the water above the submerged rock.
- Push the remaining rock on screen #2 up, all the way left. Use the ability to push it left onto the submerged rock on screen #3. Push it all the way up to complete the path to the puzzle.
Top Puzzle Solution
- Pull the moving device up x3. Pull the crystal down into the row with the device when the device will be on its left side. Let the device push the crystal into the water, making a path to the next platform.
- Pull the device up x3. This is only possible when it is in the column with the upper outlet.
- Pull the crystal into the same row as the device, with the device on its left side. Again, you must use the upper outlet. Let the device push the crystal into the water, making a path to the next platform.
- Pull the device up x3. You will need to wait for it to move right before you can perform the final pull.
- Pull the top crystal into the row with the device, so that the device is on its left side. Let the device push it into the water.
- Pull the device up. Pull the device down to put it on the right side of the remaining crystal.
- Quickly run left x2, up x2. Pull the crystal up when the device pushes it.
- Pull the device into the second row, using the outlet in the top-right corner. Pull the crystal into that row with the device on its right. Let the device push the crystal left into the water to make a path to the next platform.
- Pull the crystal down x2. Pull the device up into the same row.
- Move all the way left. Pull the crystal up when the device pushes it into the left column.
- Pull the device all the way down the left column. Pull the crystal down to the left of the device to create a path to the next platform.
- Use the device to push both crystals into the left column, but not into the water. Pull the device down into the bottom-left corner.
- Pull a crystal to the left of the device, letting the device push it left into the water.
- Pull the remaining crystal to the right of the device when it is on the submerged crystal, creating a path to the teleporter.

- Released
-
October 8, 2026
- ESRB
-
Everyone / Mild Fantasy Violence
- Developer(s)
-
Thekla Inc.
- Publisher(s)
-
Arc Games